North Pennines Stargazing Week
How to take a photo in the dark
5 December 2024
How to take a photo in the dark
by Gary Lintern, astronomer and astrophotographer
Let’s talk about what you have to do to create a successful landscape astrophotography image.
First of all, you need to be aware of the Moon’s phase. If you want to capture a truly dark landscape you need a Moonless night. There are a number of websites and apps to help with this, but you’ll usually get all the information you need from a Google search. Ideally, though, aim for the week before the New Moon, and a few days after.
At the New Moon phase, the Moon rises at sunrise and sets at sunset, so the less moonlight, obviously, the better you’ll be able to see and photograph stars and planets. On the flip side, less moonlight means that the landscapes look darker, so it does present issues with photography.
When the Moon isn’t up, you either have to tolerate extremely dark landscapes or introduce a light of your own. And there’s nothing wrong with silhouetting the landscape, especially when it’s an interesting shape, like a tree line or a mountain, or if there’s only a small amount of landscape and you’re mostly going for the sky anyway.
Most classic shots of the Milky Way are taken in portrait orientation, in other words, with the camera on its side, to fit in as many stars as possible. Landscape compositions, or panoramas are still an option though.
Let’s look at a few examples.

The photograph above was taken at Killhope Lead Mining Museum, and that’s the wheel that they used to power the machinery to crush the lead ore. It’s still there and is completely intact. You can see the bright winter constellations, like Orion. There’s no artificial lighting in the shot, and because it’s a really dark place, all you see is a silhouette. It’s still a very recognisable feature in the landscape though.
One thing you notice in a dark sky area, when the water is still, is that you get lovely reflections of the stars (below). This is the whole of the constellation of Orion, reflected in Burnhope Reservoir, Upper Weardale. There’s also the bright star Sirius, the brightest star in the sky, which is part of Canis Major, the great dog.

This is Alston Station, on the South Tynedale railway (below). I had to make several visits, but eventually, I managed to get the Milky Way lined up with the level crossing barriers.

This one is just a country scene I shot one night near Lanehead. Fortunately, the sheep behaved themselves and stood completely still. It has all of those lovely winter constellations again, the Pleiades, Taurus the Bull, the Hyades, which are part of the Bull’s horns. There’s also Orion, Canis Major, Gemini up there, and little bits of Cancer, which is quite a faint constellation.

In order to photograph starry landscapes, you need a tripod and a camera which has manual controls. In terms of settings, you need a nice wide aperture, a slow shutter speed, and a fairly high ISO. If you’re not a photographer these terms may not make a lot of sense, but it’s easier than it sounds.
Focusing on stars can be tricky, but if you have a lens with a wide aperture (at least f/2.8) you should be able to do it visually, on the LiveView screen. Autofocus won’t work, so you need to go fully manual. If you don’t have a lens with a wide aperture, I’m afraid it’s just going to be a matter of trial and error, i.e. turn the focusing ring, check the results, and then keep adjusting and checking until it’s sharp enough.
The NASA image below shows where we are in the Milky Way. You should be able to see a tiny point of light, labelled ‘Sun’. The Milky Way is a galaxy, around 100,000 light years across. If you don’t know what that means, imagine a beam of light zipping around the Earth. It could travel around our planet over seven times a second. That’s the speed of light. Now imagine travelling at that speed for 100,000 years. All you’d have done is cross our home galaxy!

When you see the bright part of the Milky Way in the sky or in a photograph, you’re looking across this spiral galaxy at that core in the middle. To us, it looks like a giant rainbow of stars which spans the night sky, from one horizon to another.
In the photograph below you can see the bright core at the centre of the Milky Way. This is Low Force Waterfall, and was taken in August around midnight. On that particular night, the Galactic Core was visible for about half an hour. In the North Pennines we can see it at night, in August and September. It returns in the spring, but much lower to the horizon and in the small hours of the morning.

This is High Force Waterfall, further up the River Tees. The Galactic Core is behind the rocks, because this was taken in September, and from a low angle.
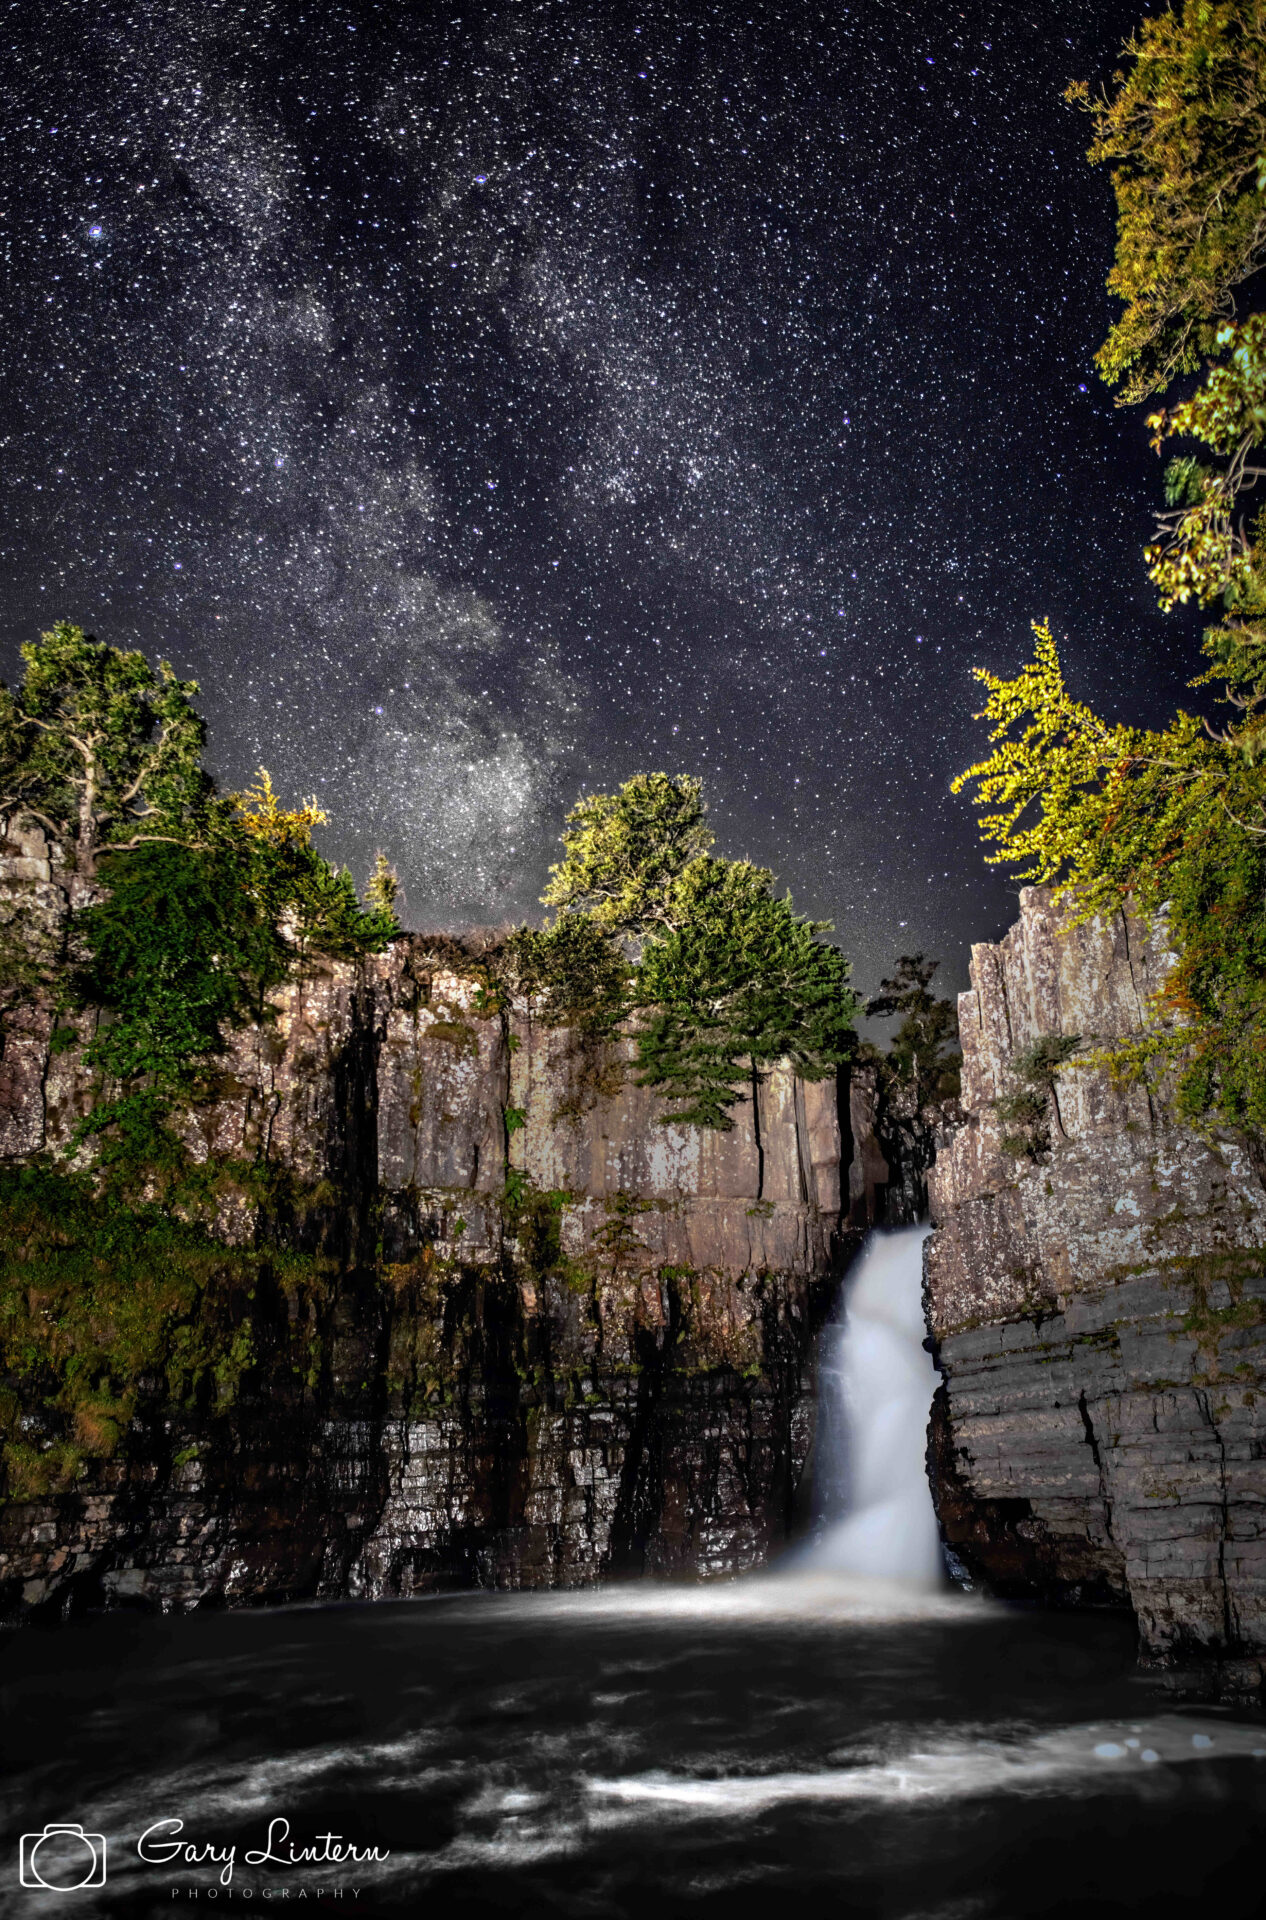
When you’re starting out, this might seem like a lot of information to take in. However, once you’ve taken your first properly-focused and well-exposed shot of the night sky, you’re ready to go. You can keep on using that same knowledge in a wide variety of locations, to capture stunning night landscapes of your own, and there’s no better place to start than the pristine dark skies and unique landscapes of the North Pennines AONB.
This blog is part of the North Pennines Stargazing Week 2020. Visit our Stargazing Week hub for more events, blogs and features.

